")
")
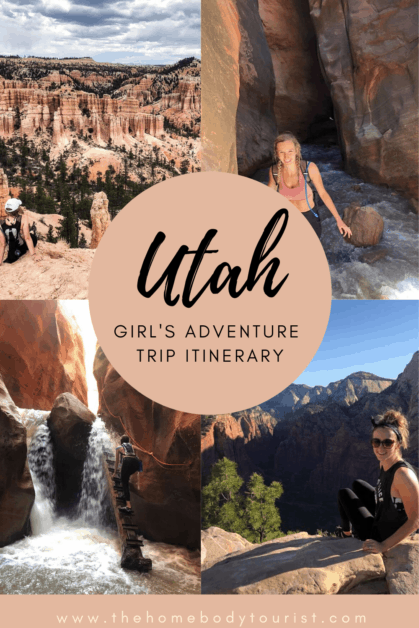
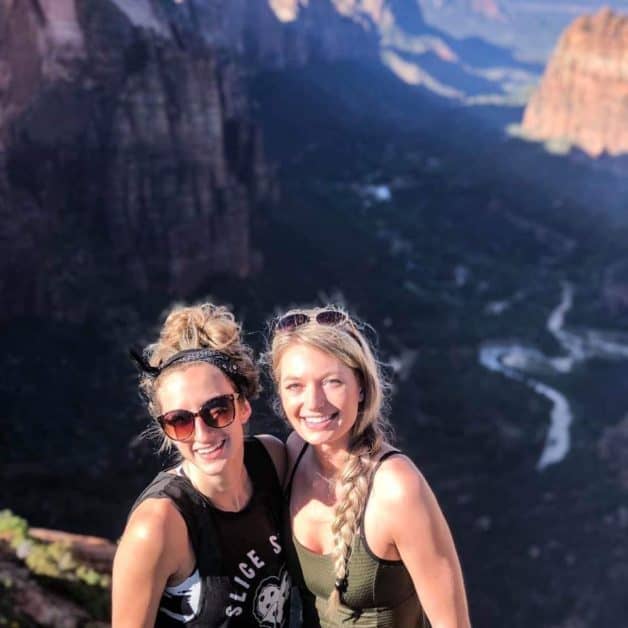
The Ultimate Utah Girl’s Trip
This was an EXTREMELY affordable, yet adventurous Utah girl’s trip. We spent less than 500 dollars per person (flight, camping, food, car, activities). We had the best time camping, swimming, hiking, relaxing, horseback riding, and exploring.
You could easily explore Utah for much longer as there are so many gems throughout the state, but this Utah itinerary is for those part-time travelers who are short on time and on a limited budget. I believe it is the perfect 5-day Utah itinerary to have an affordable, adventurous, and memorable Utah adventure!
Throughout this itinerary, you will read the best time to visit Utah, where to stay, what hikes to take, and other fun adventures to have while visiting Zion National Park.
This site contains affiliate links to products. I may receive a commission for purchases made through these links at no extra cost to you. I only recommend products that I have tried and love!
Table of Contents
When to visit?
Most of this trip takes place near Zion National Park. Below are the monthly average temperatures (in Fahrenheit) of Zion.
- Winter (Dec-Feb): 49/25
- Spring (March-May): 61/36
- Summer (June-August): 84/53
- Fall (Sept-Nov): 67/39
We visited at the beginning of June which led to chilly nights, but hot days. Be sure to pack in layers as some of our hikes started out in the ’40s, but ended in the ’80s! If looking to avoid (some) of the crowds, but still enjoy nice weather, I would suggest visiting in May or September.
What to Drive?
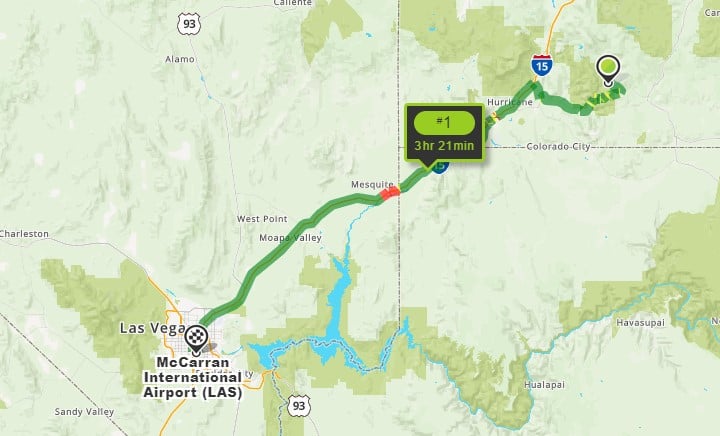
We flew into Las Vegas Airport (super cheap flights) and rented a car from there. We then had to drive about 3 hours to reach our campsite (see below).
Tip! Use the Discover Cars Search Engine to find the best rental car deal!
Where to Stay?
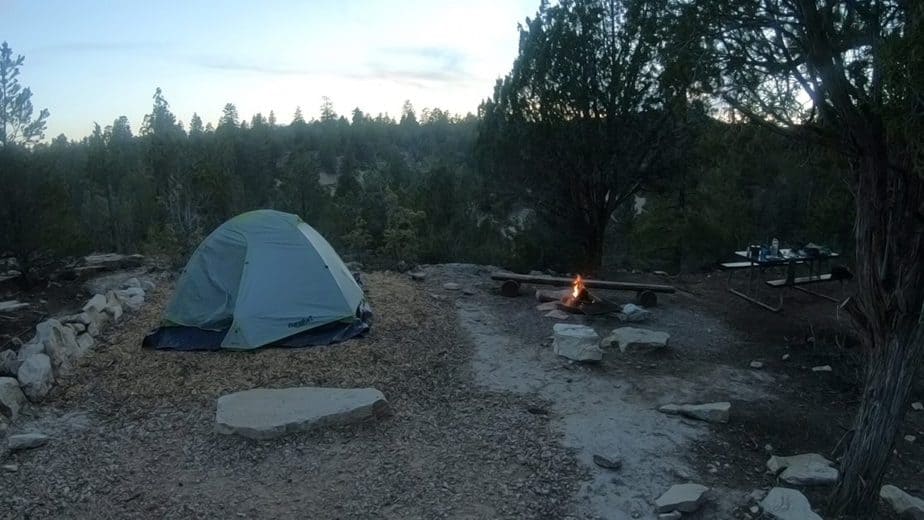
We wanted to camp, but also wanted the luxury of bathrooms. We found Zion Ponderosa Ranch and it turned out to be the perfect place. They offer glamping tents, wagons, cabins, and tent sites.
We opted for a tent site in order to keep the trip the most affordable.
Our campsite was not crowded with other campers, had a great view, and we had a short walk to the bathrooms. There is also a restaurant on the property, a pool, and hot tub, and activities to participate in.
Even though we were in a tent, we didn’t feel secluded from all modern-day luxuries. Best of both worlds!
Price per night: 30 dollars
Tip: If you are not keen on tent camping, they also have “glamping” sites with beds and other amenities. But do not worry if those sites are full, as Zion is home to some of the best glamping options!
If you prefer the comfort of a hotel… check out these comfy accommodations near Zion National Park!
- Cable Mountain Lodge– (7 miles from Zion)
- Majestic View Lodge– (9 miles from Zion)
- Zion Mountain Ranch– (13 miles from Zion)
Utah Girl’s Trip Itinerary
Day 1: Arrival
Let the Utah Girl’s trip commence! We had a late arrival, but we decided to grab a bite to eat on the Las Vegas strip before hitting the road. It takes about 30 minutes to get to the strip from the airport.
After eating, we drove halfway to our destination (about 1.5 hours) and grabbed a hotel for the night since it was already past midnight.
Hint! Be sure to use HotelsCombined Search engine as it will find the best price throughout the various hotel websties!
Day 2: Kannara Falls
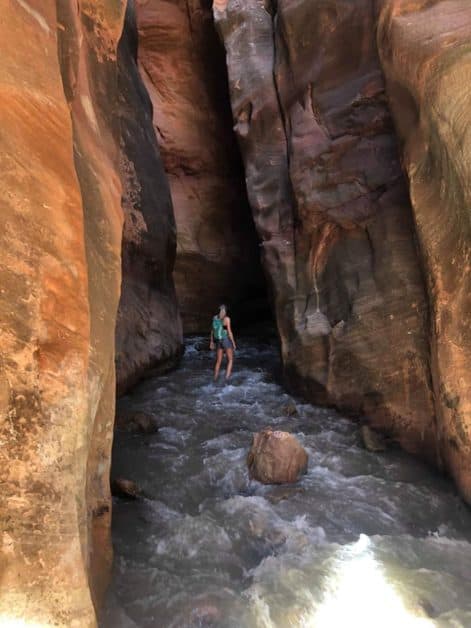
We woke up early, ate continental breakfast, and headed for our first hike. This was an amazing underrated hike through a slot canyon. Kanarra Creek Falls is a 5.5 round trip hike near Kanarraville, UT.
At less than 1 hour away from Zion, it is the PERFECT pit stop. Seriously, I highly recommend making a reservation and hiking it! Read more about hiking Kanarra Creek Falls here!
We then drove to our campsite, set up camp, and took a relaxing soak in the hot tub.
Kanarra Falls Quick Facts:
- Cost: 12 dollars (Children 3 and under are free)
- Hours: 7am-7pm
- Reservation: Yes! only 150 people allowed to hike each day
- Dog-Friendly?: No dogs allowed
- Peak Season: May-August (tickets are usually sold out…sometimes months in advance).
Day 3: Zion National Park
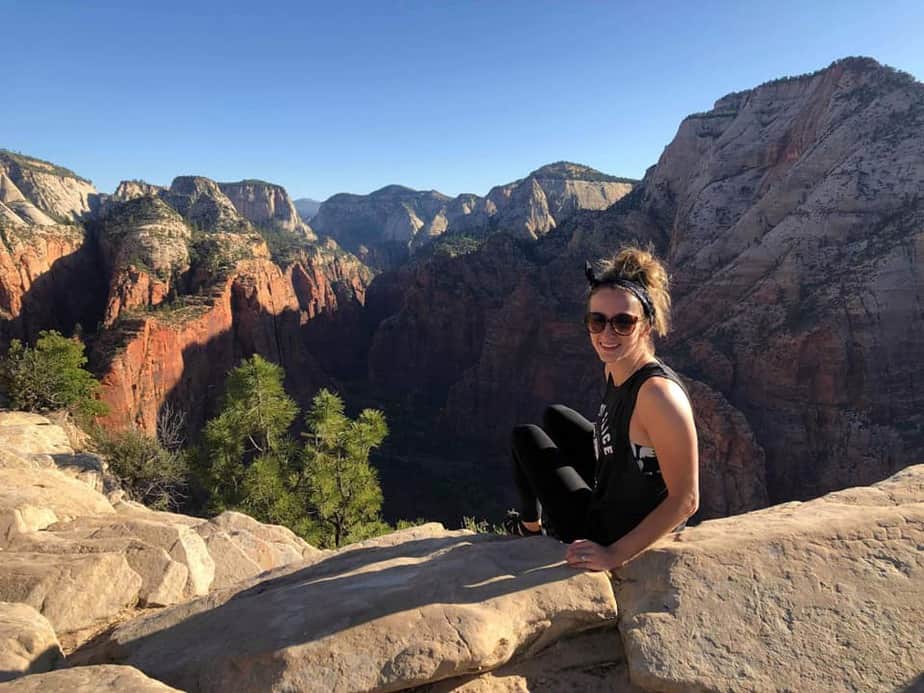
Today was the day I was going to face my fears and hike Angel’s Landing. Before arriving, I of course looked up every possible thing that could go wrong….
Angel’s Landing is a 5 mile (round trip) hike with a 1488 ft elevation gain. I mean… you are basically climbing straight up with 1,000-foot drop-offs on both sides of you. What could possibly go wrong??
We woke up at 4:30 am and headed towards the park (we had about a 40 minute drive through the park to reach the Visitors Center). You have to take a shuttle from the main parking lot and we wanted to get on the first shuttle at 6:00 am to make sure we weren’t dealing with crowds on the trail.
We ended up getting in line with about 10 people in front of us at 5:30. The line quickly filled up behind us though.
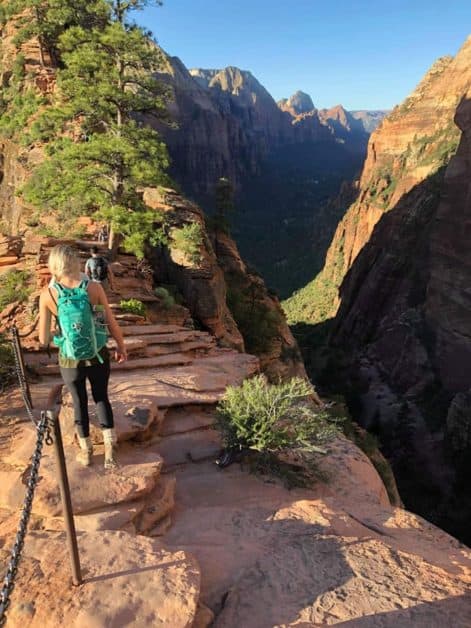
The trail was amazing! It was scary in some parts, but not as bad as I was expecting. Just be smart, use the chains, and let others pass (in a safe place), and you will be just fine. The challenge, accomplishment, and view are WORTH IT!
The scariest part was making it to the top and having the chipmunks all over you and your food (I HATE rodents….deathly afraid).
Check out my detailed Angel’s Landing Guide for all your before hike questions!
We were done hiking by 10 o’clock and went to explore other parts of the park. You do have to take the shuttle everywhere, but it is kind of nice not to have to worry about parking or driving.
We hiked to Lower Emerald Pool (1.2 miles) and checked out the entrance to The Narrows (It was still closed due to high waters in June).
Other hikes in Zion National Park:
- The Narrows Riverside Walk: Easy, 1.2 miles
- The Watchman Trail: Moderate, 3.1 miles
- The Narrows: Hard, 15+ miles
- Observation Point: (Same views as Angels Landing without the chain section) Moderate 6+ miles
Check out other hikes HERE.
Zion National Park Quick Facts:
- Visitor Center/Park Store Hours: 8am-6pm
- Entry Price: 35 dollars per car
- Winter Shuttle: Only runs during Holiday Weeks
- Least crowded: November and February
- Camping: There are three campgrounds in Zion, and others closeby
- COVID Update: Shuttle requires reservation- Learn more HERE
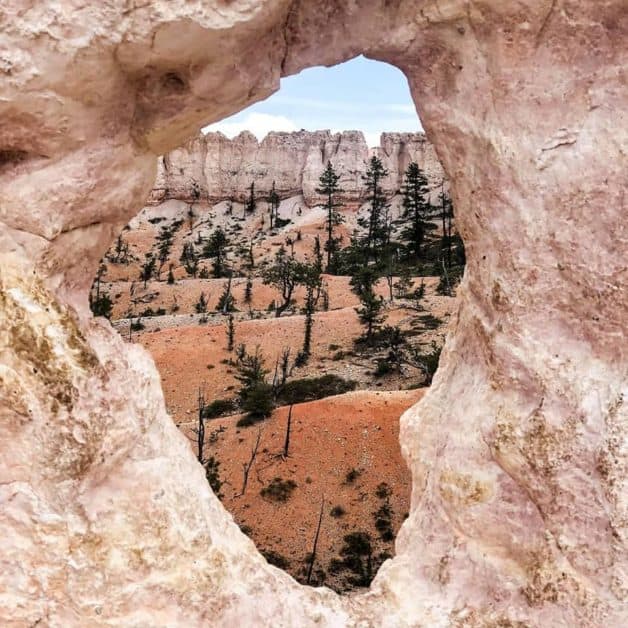
Day 4: Bryce Canyon National Park
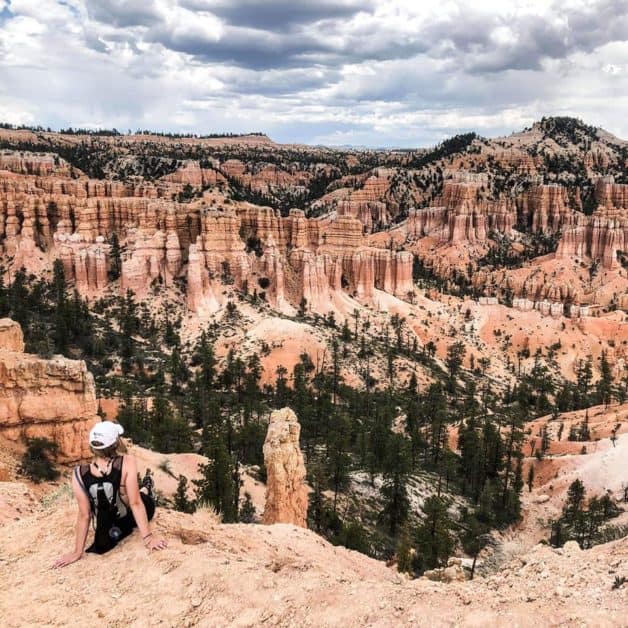
We decided to make the drive to Bryce Canyon last minute. People at Zion told us Bryce was less crowded and just as amazing, so we wanted to see for ourselves.
They were definitely right! We hiked Fairyland Loop. It was a 7.4-mile hike, but an easy trail through miles of Hoodoos. We only saw a handful of people the entire time!
Bryce Canyon National Park Quick Facts:
- Distance from Zion: 1 hr and 17 minutes
- Entry cost: 35 dollars per car
- Visitor Center Hours: 8am-8pm (summer hours)
- Camping: 2 campgrounds +backcountry camping
- Pet-friendly: Pets are only allowed in campgrounds and paved viewpoints and parking lots
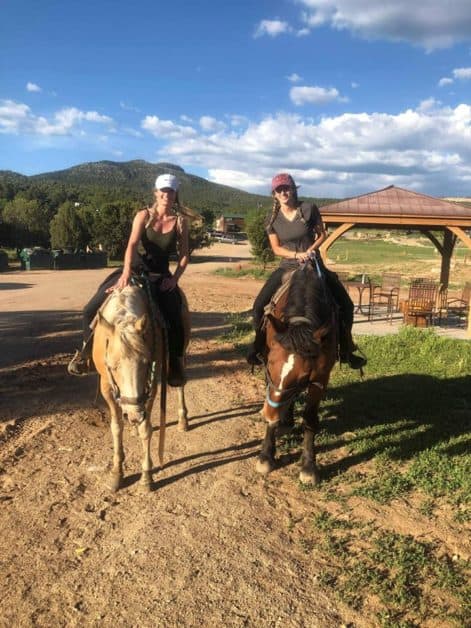
After our hike, we headed back to the campsite and decided to go on a trail ride with their horses on-site. You can make reservations right at Zion Ponderosa and you leave from the campground.
Horseback riding: 50 dollars
Day 5: Departure
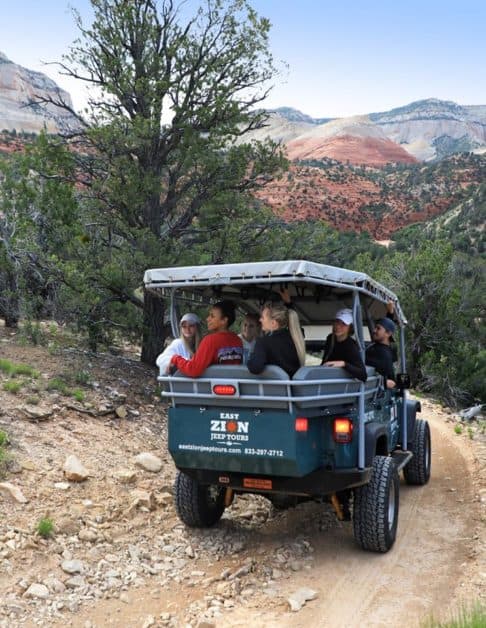
We had a very late flight (again… hurray for late flights…leads to an extra day to explore), so we decided to take a jeep tour that morning. It again was right on-site at Zion Ponderosa. They took us to a private slot canyon that we were able to explore on our own. It was cool to be able to see sights that we didn’t know were there from a different perspective.
After our jeep tour, we head back towards the Las Vegas Strip to grab a drink and dinner. Our flight was delayed so we had more time to relax and enjoy people watching on the strip.
Helpful Items to Pack
Again… I only link products that I have tried and I truly love 🙂
- Sleeping Pad (I used this one and it was actually very comfy, small enough to pack and very affordable!)

- Hammock
- Keens!
- Gopro

- Hiking first-aid kit
- Waterpack

We had the best budget-friendly Utah Girl’s Trip for under 500 dollars. There are ways to see the world at affordable prices! I highly recommend all the hikes we did and Zion Ponderosa! Be sure to check it out!


Interested in other girl’s trips?
What else would you add to this Utah Girl’s Trip Itinerary? Let me know below!
")

This looks like so much fun and just the right kind of travel right now. Gorgeous pics.
Looks like you ladies had an amazing time!! I am dying to visit Utah and visit all the gorgeous parks, so many cool hikes!
This looks amazing, would love a girls trip like this! My partner and I visited Bryce Canyon a few years back and it was stunning, definitely worth getting there early to explore
You look like you had the best time! The landscape of Utah is gorgeous!
Kannara Falls is such a gem! I really appreciated the permit system and the steps the city has taken to protect the trail from over-use. I hiked to the falls in February and had a blast, even though my toes did get pretty chilly. Next time you are in the St. George area, I highly recommend Snow Canyon State Park (stunning) and Zion National Park’s Kolob Canyons (away from the crowds).
What an absolutely stunning trip! I have been wanting to get to Utah since I moved to the US almost 5 years ago. It’s one of those places that I keep putting further down the list to go elsewhere. Obviously, I need to change that!
I had planned a trip to Utah for May but it’s definitely not happening 🙁
Cant wait for all this to be over so I can go! Loved your post!
Utah seems so lovely thanks for presenting it so well!
One day I will road trip across the US. Can’t wait to see Utah. Look and sound so amazing.
You’ve definitely convinced me to hightail it to Utah as soon as humanly possible! Love your pictures!
I’ve always wanted to visit Zion and Bryce Canyon National Parks. It sounded like a wonderful trip. Great photos!
I am really hoping to do a road trip through the US when I am back home and Utah has always been a state I want to visit. Now looking at your pictures I want to go even more! Thanks for all the great information that I will surely be using one day!
I would have never guessed that Utah would be a good girls trip destination but now I’m convinced!
Would love to go to Utah and see the national parks! Looks like so much fun 🙂
What an epic girls trip! It looks like you two had so much fun. My husband and I traveled through the Big 5 National Parks a few years ago, but I’d love to go back – and maybe bring some girlfriends this time! 😉